
As a soldier or someone who loves military fashion, it’s essential to know how to tie your military boots correctly. Tying military boots isn’t like tying your regular shoes. It requires a specific method that ensures your boots are snugly tied to your feet and won’t come loose during any activity. In this guide, Thefellowsoldiers.com show you how to tie military boots like a pro!
What You’ll Need
Before we dive into the actual steps, you’ll need to gather a few essential items. These include:
- A pair of military boots
- Socks (preferably thick ones)
- Boot blousers (optional)
Step 1: Loosen the Laces
The first step in tying your military boots is to loosen the laces completely. Pull the laces out of the top eyelets and loosen them from the bottom up. Make sure the tongue of the boot is straight and positioned correctly.

Step 2: Start Lacing
Start lacing your boots by inserting the laces into the bottom eyelets. Pull the laces tight to ensure the boots are snugly fitted around your feet. Be sure to pull the laces evenly to ensure your boots are tied correctly.
Step 3: Cross the Laces
Once you’ve threaded the laces through the bottom eyelets, cross them over each other and insert them into the eyelets above. Pull the laces tight to keep the boots snug around your feet.
Step 4: Create a Lock
Next, take the left lace and wrap it around the right lace at the point where the laces cross. Repeat the process with the right lace, wrapping it around the left lace. Pull both laces tight to create a lock.
Step 5: Loop the Laces
After creating the lock, take the left lace and create a loop by bending it back on itself. Hold the loop in place with your left hand.
Step 6: Cross the Laces Again
With your right hand, take the right lace and cross it over the left loop. Thread the right lace through the loop from underneath and pull it tight.
Step 7: Repeat
Repeat the process by creating another loop with the right lace, crossing the left lace over it, threading it through from underneath, and pulling it tight. Continue looping and crossing until you reach the top of the boot.
Step 8: Tie a Bow
Once you reach the top of the boot, tie a bow with the remaining laces. Make sure the bow is tight enough to keep your boots snugly fitted around your feet.
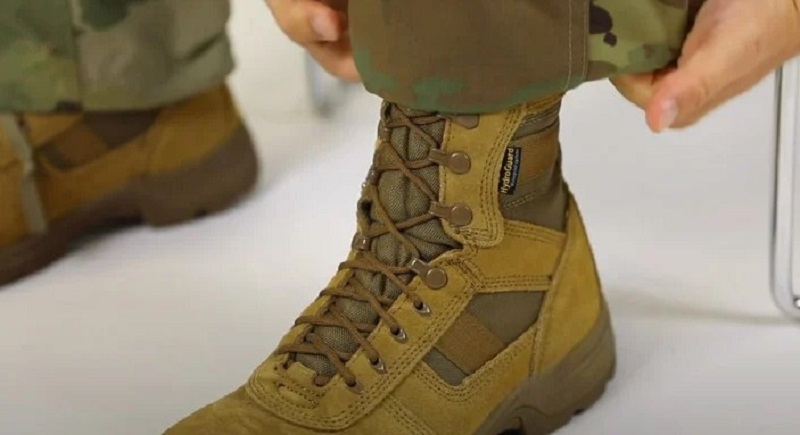
Step 9: Blouse the Boots
If you’re wearing fatigues, you can blouse the boots to keep them looking neat and professional. Blousing involves tucking the bottom of your pants into the top of your boots.
To blouse your boots, fold the excess fabric at the bottom of your pants up and over the top of your boots. Use a boot blouser to keep the fabric in place.
Step 10: Final Check
Before you step out, do a final check to ensure your boots are securely tied and snugly fitted around your feet. Make sure the tongue of the boot is straight and positioned correctly.
Congratulations! You now know how to tie your military boots like a pro.
>>> Read more: How To Carry A Tactical Tomahawk & Carry Methods for Newbies
FAQs
1. Why do military boots require a specific method of tying?
Military boots require a specific method of tying because they are designed to provide better support and protection for the feet during physical activity.
2. How tight should military boots be tied?
Military boots should be tied tight enough to prevent slippage but not so tight that they cut off circulation to your feet.
Video:
Related Posts